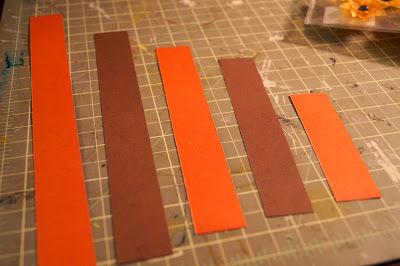
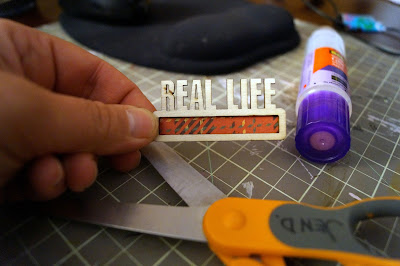
Hello everyone, welcome the next installment of Tuesday Technique! Actually I guess its Thursday Technique as I am a couple of days late! LOL As we all know Washi Tape seems to be newest scrapbooking fad that’s taking flight. I am not one usually to follow fads but I like the look it adds to your pages so I figured why not give it a try. Several years ago when I first started scrapping I bought this “how to” book that showed lots of different techniques for adding depths to your pages. One technique was using packing tape to transfer pictures onto the tape and then onto your pages. So I thought if this could work for pictures why not for paper? So I gave it a try. Here is what you need to try it out also:
Supplies:
1. Regular scotch tape (you can even use the dollar store brand)
2. Scraps of patter pattern papers
3. Bone folder
4. Bowl of water
5. Scissors
Step 1: Cut your pattern papers the size of the tape and whatever length you desire, I think it measures about ¾ inches in width. Its ok if your tape isn’t perfectly aligned or just the right size of the tape, it will all come out in the “wash” get it? LOL.
Step 2: Cover paper strips with Scotch tape, use your bone folder to make sure the paper is securely attached to the tape. As you do this the paper will start to curl (see photo below).
Step 3: Once you have completed step 2, place the strip(s) in a bowl of water for about 20-30 seconds, or longer if need be. Let it soak in the water until back of paper feels soft enough to rub off.
Step 4: While still submerged in water, turn the strip of paper over and peel off the back of paper with your fingers. Use your fingertips or thumb to rub off the white part of the paper backing under the water until ALL of the white paper backing is gone.
Complete these steps with each sheet of your strips of pattern papers. When you are done you will have your own virtually cost free washi tape!
Aren't they adorable?
Make sure you let them dry completely before adhering to your projects. You can trim the ends at an angle to make it look more like tape, the possibilities are endless!
Make sure you join us next week for our Blog Hop so you can see how I used them on a project!
Showing posts with label Technique Tuesday. Show all posts
Showing posts with label Technique Tuesday. Show all posts
Thursday, December 3, 2015
Tuesday, November 17, 2015
Technique Tuesday : Thanksgiving Place Setting/Table Decoration
For today's Technique Tuesday I'm actually going to share a super simple "mini" tutorial with you! Something perfect for the upcoming holiday...Thanksgiving!
I used one double sided sheet of paper from my Birds of a Feather November kit, some flowers from the kit and added an additional patterned paper from the kit later on (the word FAMILY was cut from this sheet) as well as a length of ribbon.
First I cute 5 strips of paper all measuring 1 inch in width and the following in length: 9 1/2, 8, 6 1/2, 5 and 3 1/2 inches.
I then cut holes on all of my strips on both ends...
Thread your ribbon through all the strips on one end...
and then feed them through the other ends of the paper strips.
When the ribbon is through all of the paper strips tie the ribbon so that it looks like so...
Now you can embellish as you see fit! These would look cute as name holders on your Thanksgiving table or scattered about a little arrangement of mini pumpkins and gourds too!
Labels:
Jen Davis
,
November kit
,
Technique Tuesday
Friday, November 6, 2015
Get chalky! - Technique Tuesday - Jen T.
Hi all, jen t here. Happy technique tuesday! Today i wanted to share how i did my give thanks on my door sign. First i doodled ( you can also print out a saying off the internet) the saying i wanted on a piece of paper then i tweeked it and retraced it with marker so i could see my changes.
Next, i took a piece of regular chalk( i used my kids sidewalk chalk) on the reverse side and scribbled it to cover the whole area behind the words. Lastly, i flipped the paper over and placed it onto the chalkboard sign. Then just traced with a pen around my words . I lifted the paper up and then i was left with a faint outline of the sidewalk chalk. To finish, i took the chalk marker and traced and filled in the letters.
Thanks for stopping by and happy creating!
Jen T.
Tuesday, October 27, 2015
Technique Tuesday
Today I'm sharing not really a "technique" but a way to make the most of some of your scrapbook embellishments included in this month's kit! Those wooden phrases and shapes are pretty cool all on their own but it's amazing how you can change them up by simply adding a bit of some of your patterned paper scraps behind them!
Simply take your wooden shape and find some patterned paper that you want to back it with and adhere using your favorite adhesive that will work with both wood and paper. I love my Scotch brand 2-way glue!
I don't worry about it getting the paper the right size right off the bat...I stick it on the back and trim it up afterwards.
Looks pretty good like this...but I wanted to add something extra.
Some word stickers were perfect as something added...you could also journal right in this space as well.
Here is another sample of where I used this little technique on the wooden phrases on another layout...
Let me know if you have tried this or link up a project where you did this so I can check it out!
Thursday, October 15, 2015
Technique Tuesday
Hey all please forgive the tardiness of my Tuesday Technique post. This was a crazy week for me and the days have just all kind of joined together! Anyway on to our tutorial.
I dont know about you but I love alcohol inks, I spray nearly every page I make. However, by using so much it becomes expensive over time with buying more so here's a way to make your own! Here is what you will need:
How to:
I dont know about you but I love alcohol inks, I spray nearly every page I make. However, by using so much it becomes expensive over time with buying more so here's a way to make your own! Here is what you will need:
- Small empty spray bottle which you can pick up from Michaels or Hobby Lobby, even Wal-Mart has them.
- Powder Kool-Aid color of your choice.
- Rubbing Alcohol
Place the Kool-Aid powder in the bottle; fill it
up almost to the top with rubbing alcohol. Shake to dissolve. You can add more or less powder, depending on how intense you want
the color.
I used red and green in this example. For the red I used the entire package because
I wanted a deeper hue. Some colors are
more intense than others so start with about 1 tsp and work your way up if you
need to.
You can also use RIT dye powder or liquid form which works the
same way as the Kool-Aid but with RIT you will use a lot less as they are very
intense.
I hope you enjoyed this tutorial. I will post my example using this technique in my next reveal so stay tuned!
Tuesday, September 15, 2015
Technique Tuesday by Jen D.
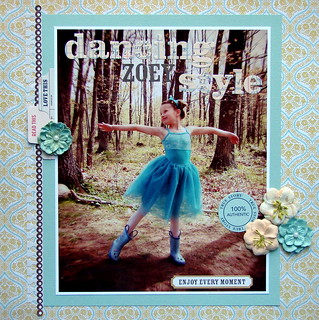
One of my favorite things to do on a layout is find unique space(s) to put my lettering and or text. Sometimes it's as simple as adhering them right on top of my photos...take a look at your photos and see if there is dark or light space that would be the perfect spot to add some stickers! You might be surprised at how fun it is to add them right to your photos!
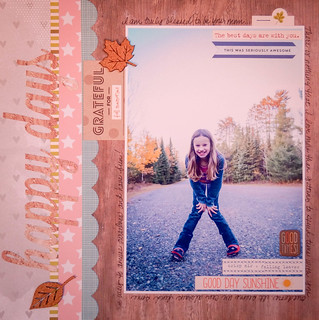
I shared a few of my favorite layouts showing how I did this.
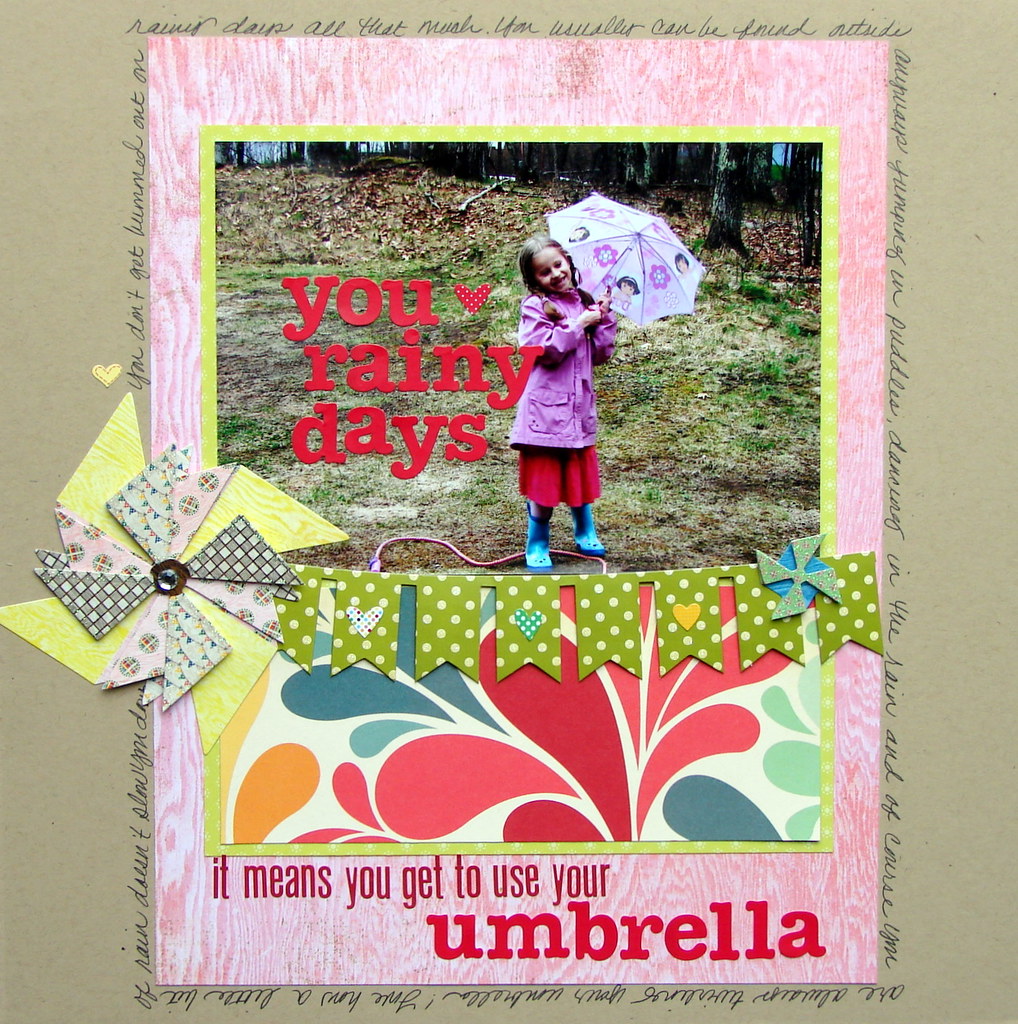
Be sure to share your layouts with me if you decide to try this easy and fun tip!
Subscribe to:
Posts
(
Atom
)


